Introduction
Owning an iPhone means dealing with the occasional frustration of a damaged charger cable. These cords are essential for keeping your device powered, and when they fail, it can be incredibly inconvenient. Fixing an iPhone charger cable doesn’t always require a visit to the store or buying a new one.
There are several methods that can restore your charger cable to its former glory, ranging from DIY solutions to more advanced repairs. Whether you’re dealing with frayed ends, loose connectors, or a completely non-functional cable, this guide will walk you through the steps needed to address these common issues.
Identify the Problem
The first step in fixing an iPhone charger cable is to identify the specific problem. Common issues include frayed wires, bent connectors, and broken or completely severed cables. Here’s a quick checklist to help determine what’s wrong:
- Visual Inspection: Check for visible damage such as fraying or exposed wires.
- Bent Connectors: See if the cable ends or connectors are bent or appear loose.
- Test Functionality: Plug the charger into your iPhone and see if it charges. If it doesn’t, wiggle the cable to see if it temporarily fixes the problem.
- Connector Cleanliness: Sometimes dirt or debris in the connector can stop it from charging properly. Ensure both the cable connector and iPhone port are clean.
Recognizing the exact issue is crucial as it determines the appropriate fix. Once diagnosed, you can choose the right method to repair the cable.
Common DIY Fixes
For minor damages, several simple at-home repairs can prolong the life of your iPhone charger cable.
Cleaning the Connectors
- Unplug the cable from the power source and iPhone.
- Use a toothpick or small brush to gently clean inside the connectors.
- Remove any dirt or debris around the connector area.
- Test the cable to see if cleaning resolved the issue.
Straightening the Cable
- If the cable’s connectors are bent, gently straighten them using a soft, steady motion.
- Avoid excessive force, as it can further damage the cable.
- Check the cable’s functionality by plugging it into your iPhone.
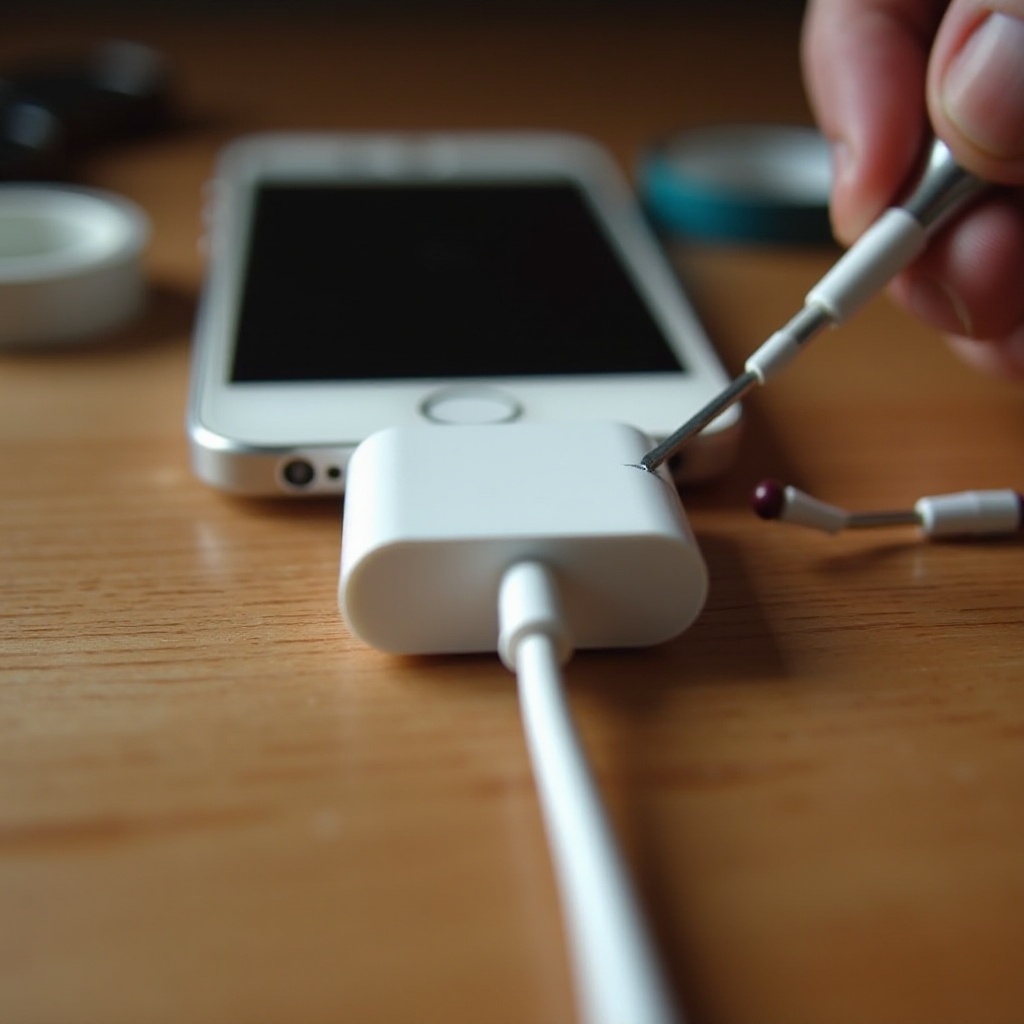
Using Electrical Tape
- Identify the frayed sections of the cable.
- Wrap electrical tape around the damaged area, securing the exposed wires.
- Ensure that the tape covers the frayed section thoroughly.
- Test the cable for charging capability after taping.
Advanced Repairs
If DIY solutions don’t solve the problem, advanced repair techniques might be necessary.
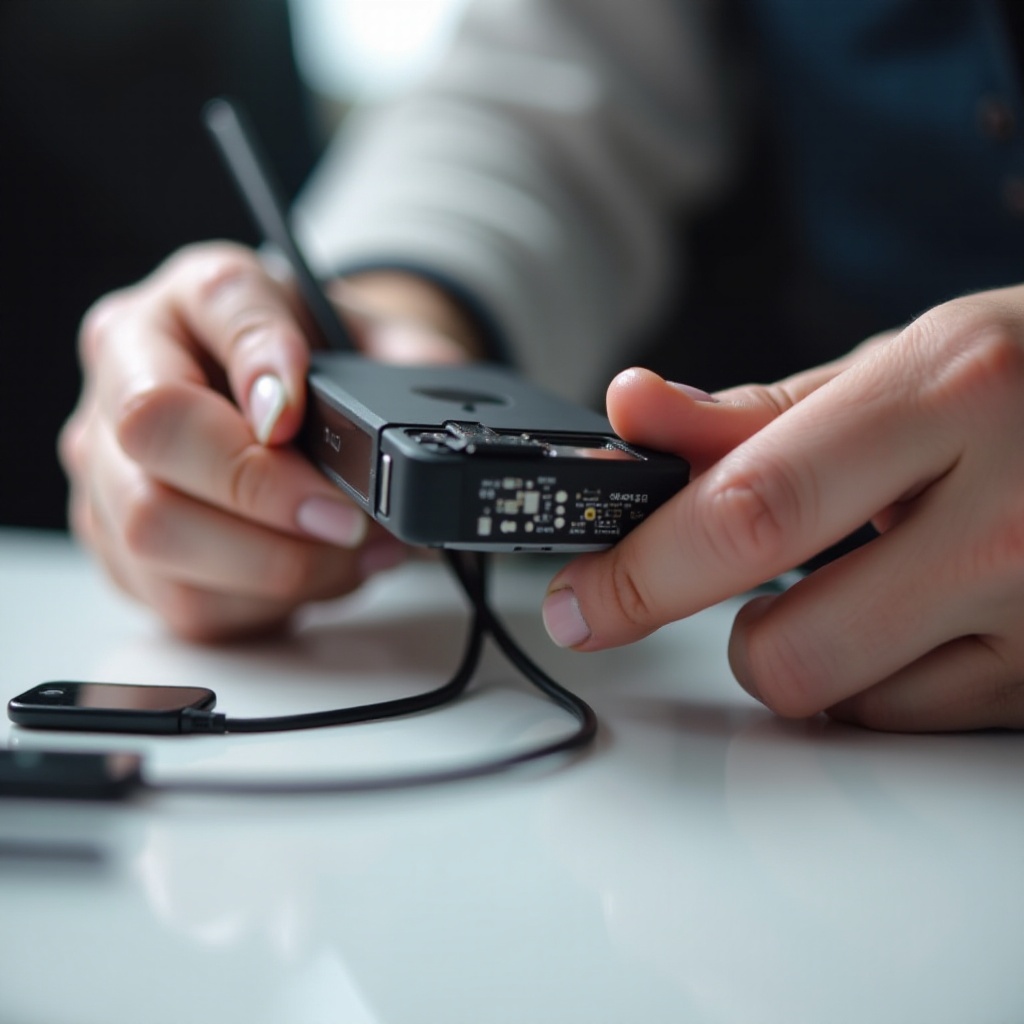
Soldering Broken Wires
- Gather soldering supplies: a soldering iron, solder, heat shrink tubing, and a heat gun.
- Cut the cable to expose the broken wires.
- Strip the insulation off the wires and twist matching wire colors together.
- Apply heat shrink tubing to the wires.
- Solder the twisted wires and then slide the heat shrink tubing over the joint.
- Use the heat gun to secure the tubing.
Replacing the Connector
- Purchase a new Lightning connector.
- Cut the old connector off, leaving some wire attached to ensure enough length.
- Strip the cable ends, exposing the wires inside.
- Solder the wires to the new connector based on matching colors.
- Secure the connection with heat shrink tubing or electrical tape.
Using a Heat Shrink Wrap
- Cut a piece of heat shrink wrap large enough to cover the damaged area.
- Slide the heat shrink wrap over the cable.
- Use a heat gun to shrink the wrap tightly around the damaged area, reinforcing the cable.
- Check to see if the cable works properly after the wrap is applied.
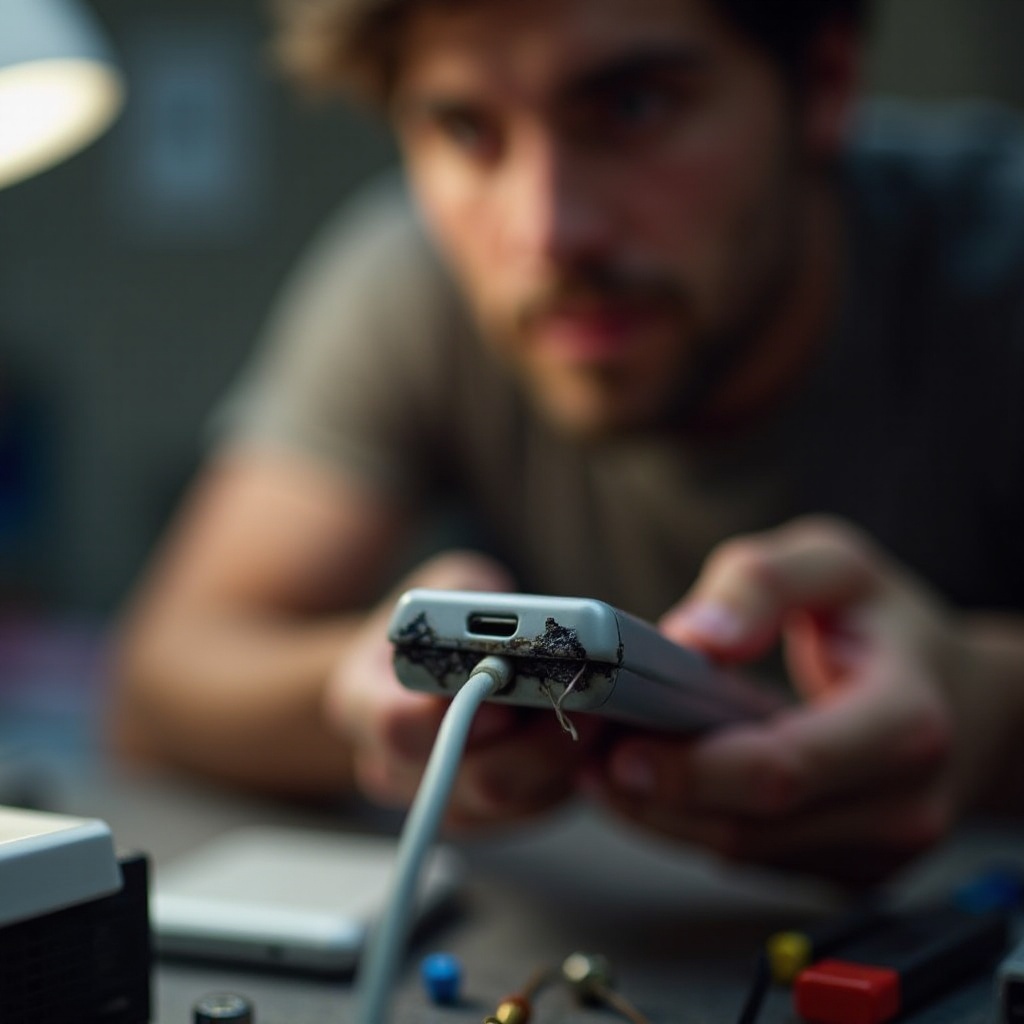
When to Seek Professional Help
Sometimes, DIY fixes are not enough, and professional assistance becomes essential. If your charger cable remains non-functional after trying the aforementioned methods, consider the following:
- Persistent Issues: If none of the fixes work, the internal damage might be too extensive.
- Complex Damage: For cables with multiple broken wires or severe internal damage, a professional repair service is recommended.
- Device Safety: Attempting advanced repairs without the proper tools or expertise can lead to further damage, potentially harming your iPhone.
It’s wise to visit an authorized Apple service provider or a reliable technician to assess and fix complex issues.
Preventive Measures
To avoid frequent repairs or replacements, consider these preventive measures to prolong the life of your iPhone charger cable:
- Proper Storage: Avoid winding the cable too tightly or sharply. Store it in a loose coil to prevent kinks.
- Cable Protectors: Use cable protectors at the ends of your cable to reduce strain.
- Gentle Usage: Handle the cable with care while plugging and unplugging to prevent damage to the connectors.
- Keep It Clean: Ensure both the connector and the charging port are free from dirt and debris to maintain good connectivity.
Implementing these habits can significantly extend the lifespan of your charger cable and prevent common damages.
Conclusion
Addressing issues with an iPhone charger cable doesn’t have to be daunting. By identifying the specific problem and applying the appropriate fix—whether a simple DIY method or advanced repair—you can save time and money. Remember, when faced with complex damages, professional help is the safest route. Preventive measures further ensure that your charger cable remains in good condition for an extended period.
Frequently Asked Questions
How can I prevent my iPhone charger cable from breaking?
To prevent breaking, store the cable loosely and avoid tight coils. Use cable protectors to minimize strain on the cable ends, handle it gently while plugging and unplugging, and keep the connectors clean from dirt and debris for optimal performance.
Is it safe to use third-party cables for my iPhone?
Using third-party cables can be safe if they are certified by Apple’s MFi (Made for iPhone) program. Non-certified cables may not meet safety standards and could damage your iPhone.
What should I do if my iPhone stops charging completely?
First, check if the cable and charger are functioning by testing with another device. Inspect and clean the charging port on your iPhone. If it still doesn’t work, try using a certified cable or consult a professional for further diagnosis and repair.